
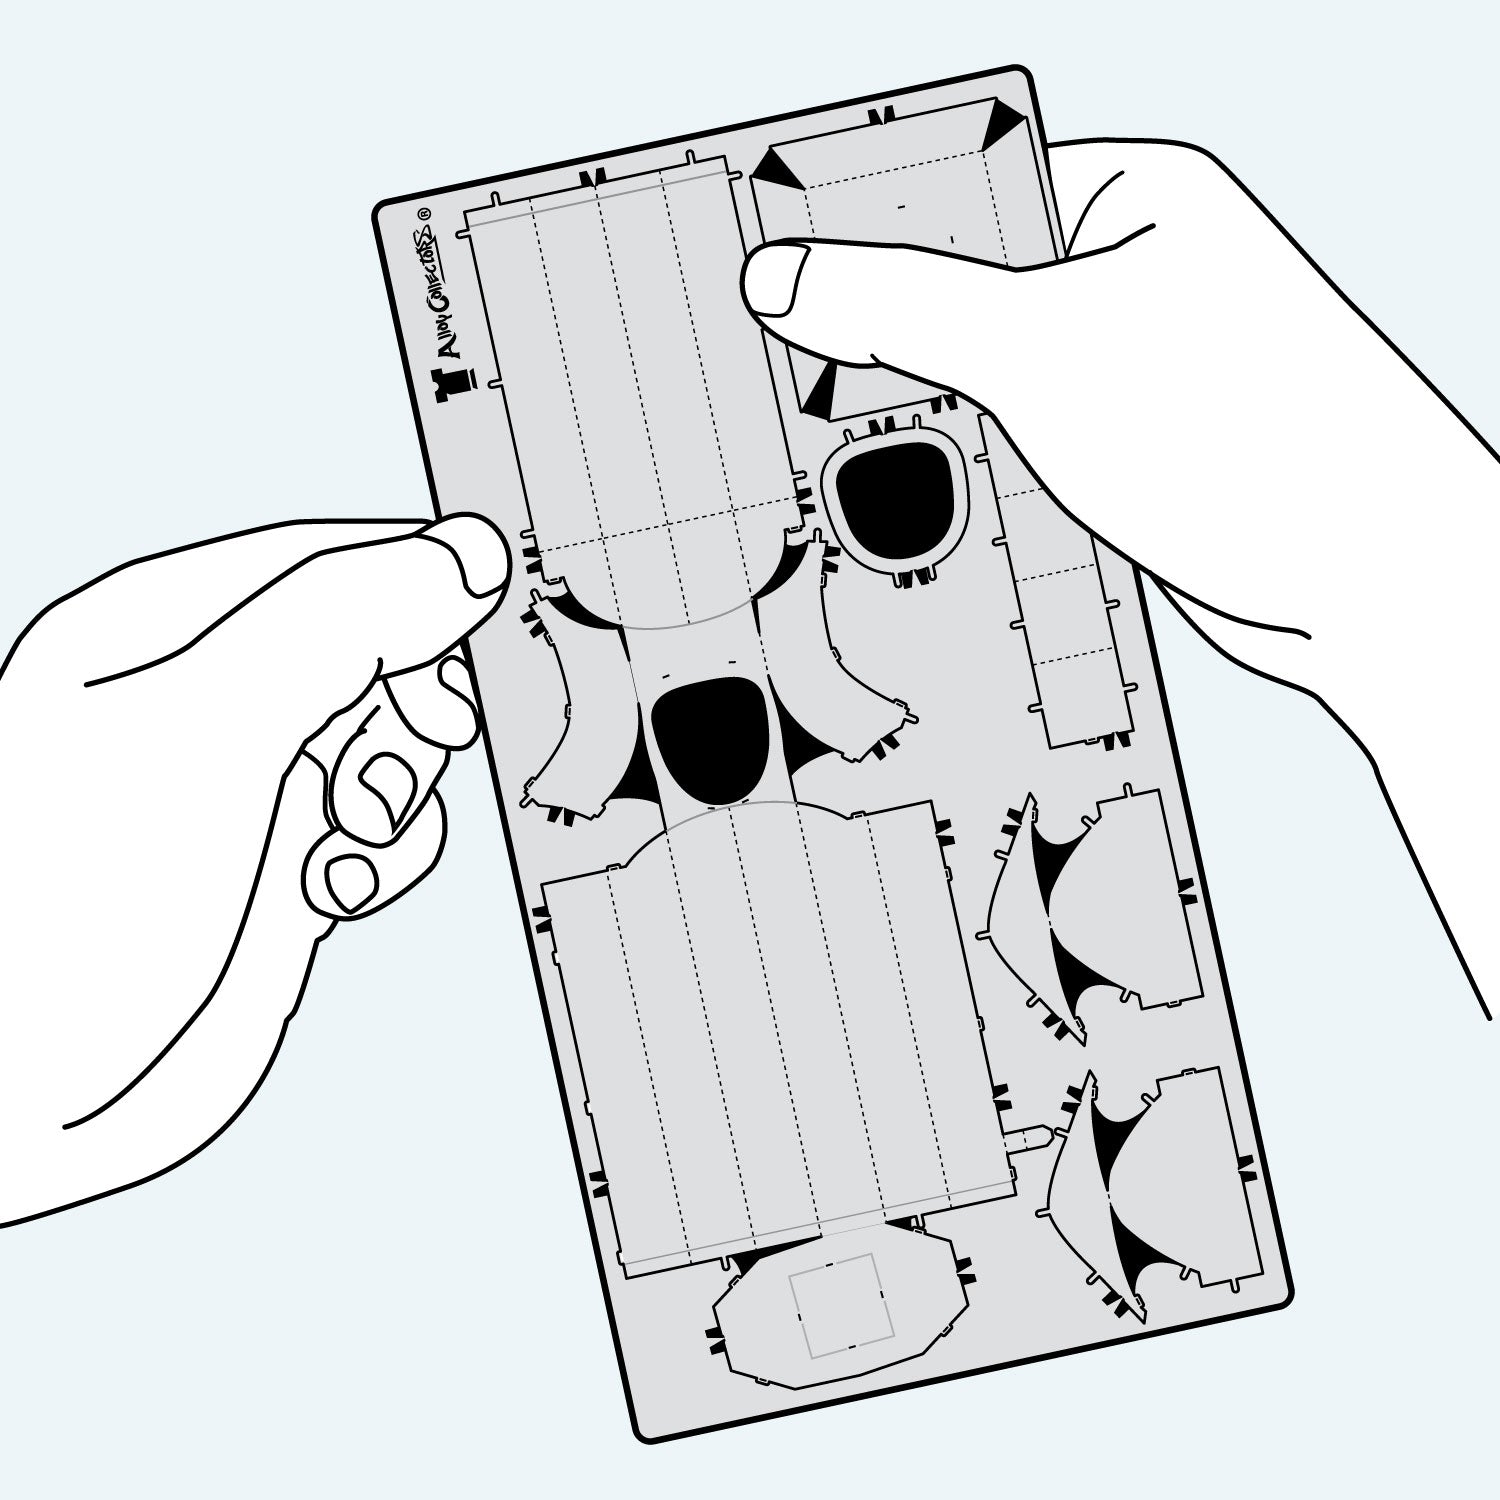
When removing parts from the sheet, only remove parts from the sheet when indicated by the instructions to avoid losing any parts.
Parts are removed by gently bending and snapping the tiny triangular anchor points that connect each part to the frame.
When folding, please pay attention to the front and back and the direction of the arrows indicated by the instructions.
Remember to fold/curve slowly.
Do not fold repeatedly to avoid damage to the parts.
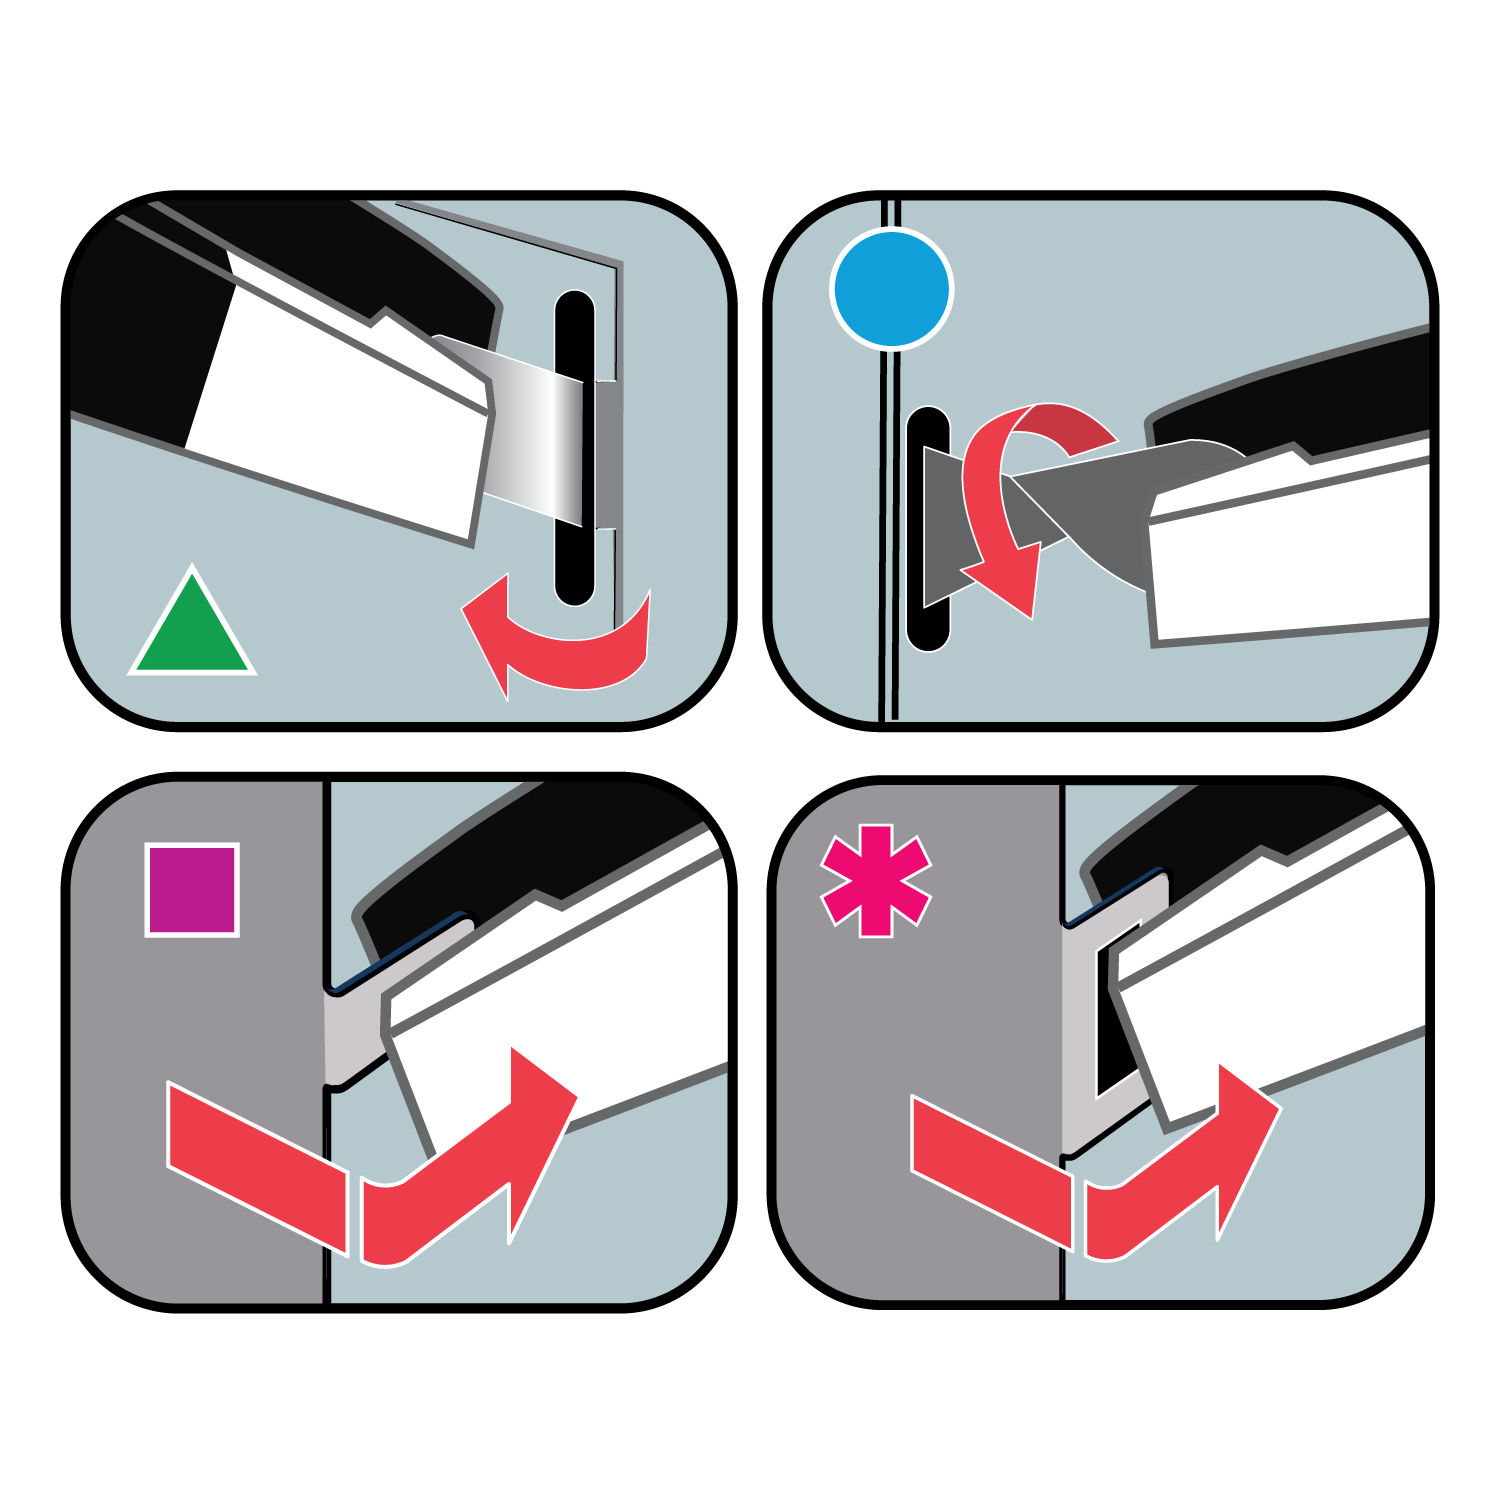
- Where a green triangle is shown on the instructions, slot the tab into the corresponding slot and use a 90° bend to secure the part.
- Where a blue dot is shown, slot the tab into the corresponding slot and twist the tab by 90°. This pulls the parts together and makes a strong structure.
- Where the Pink star is shown, bend the slot at 90° before inserting the tab.
- Where the purple square is shown, bend the tab at 90° before inserting into the slot.
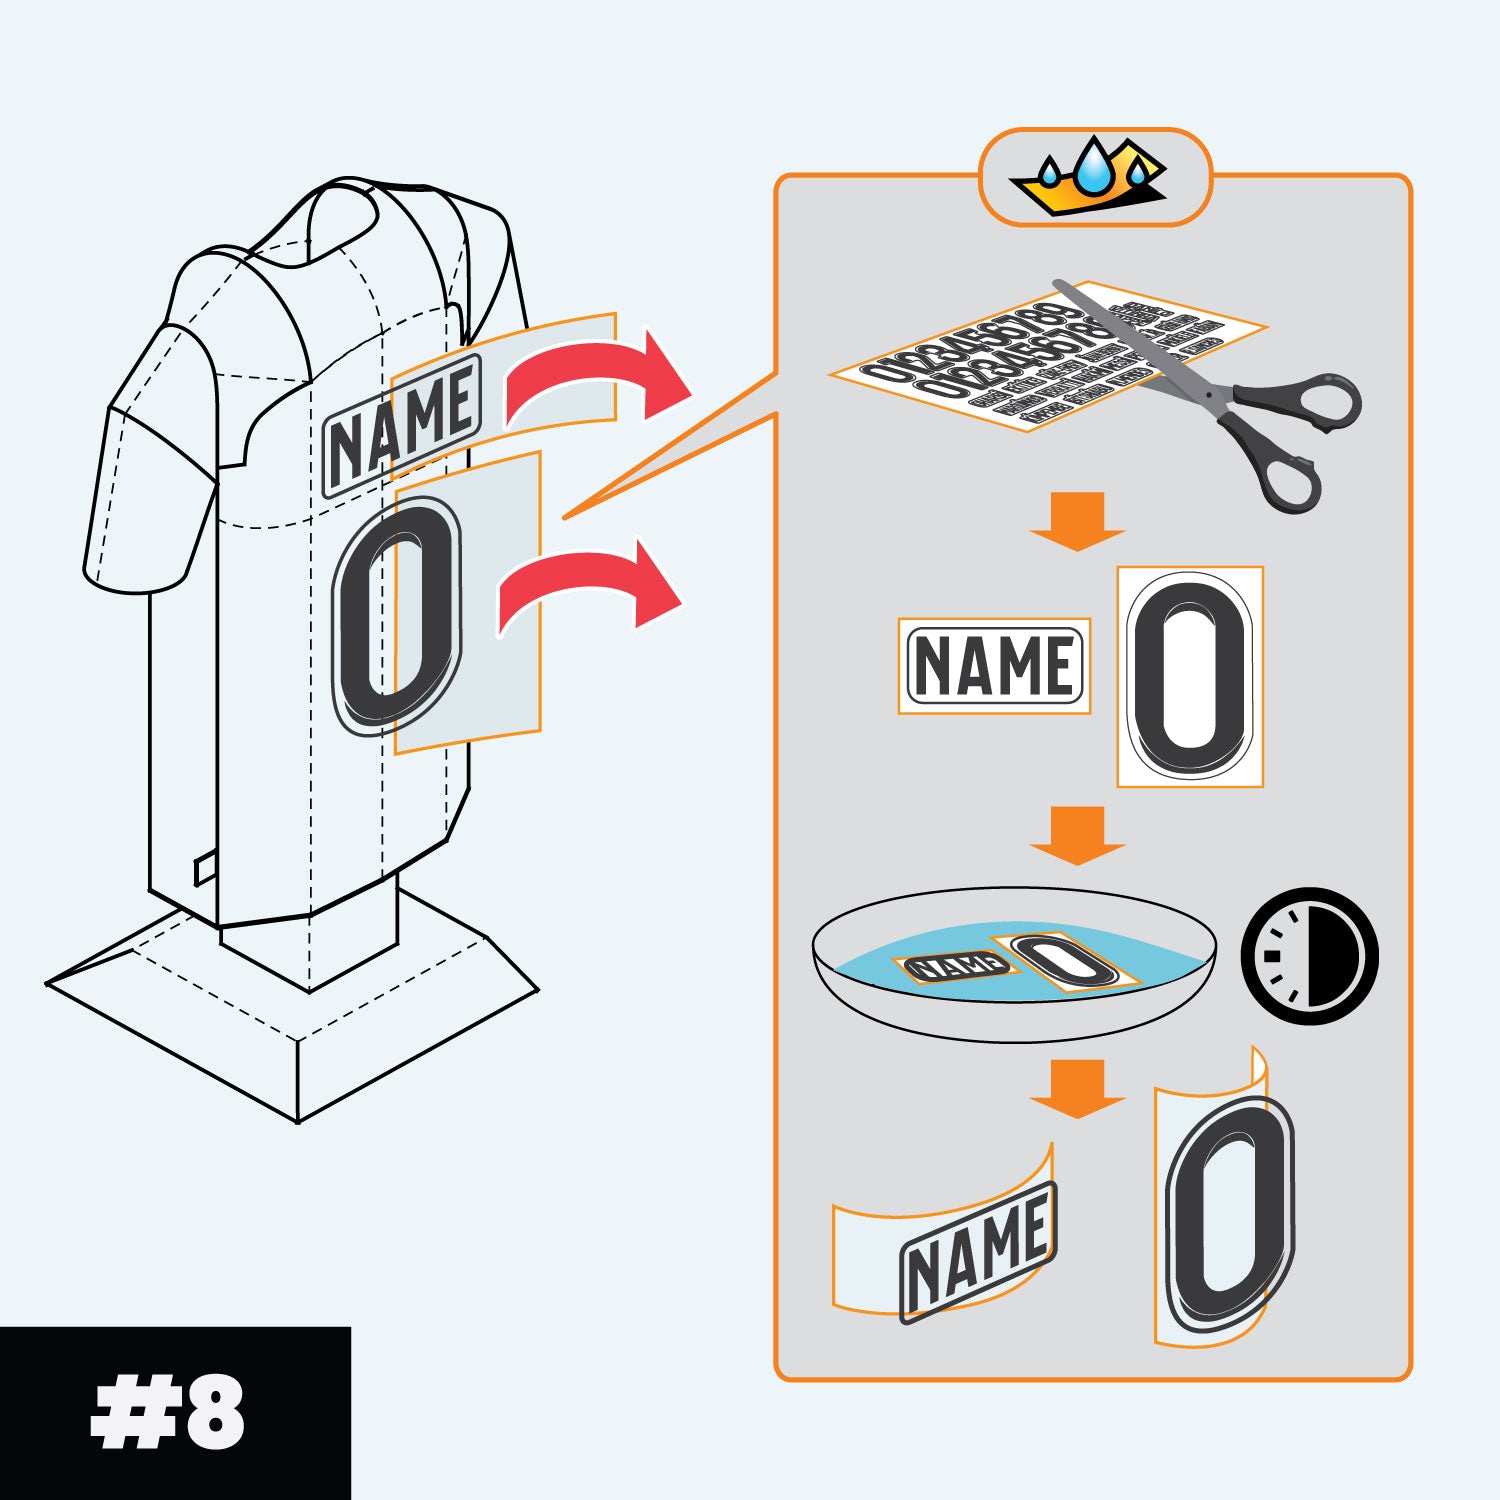
3D Jersey Kits
Only our Jersey Kits Require Building.
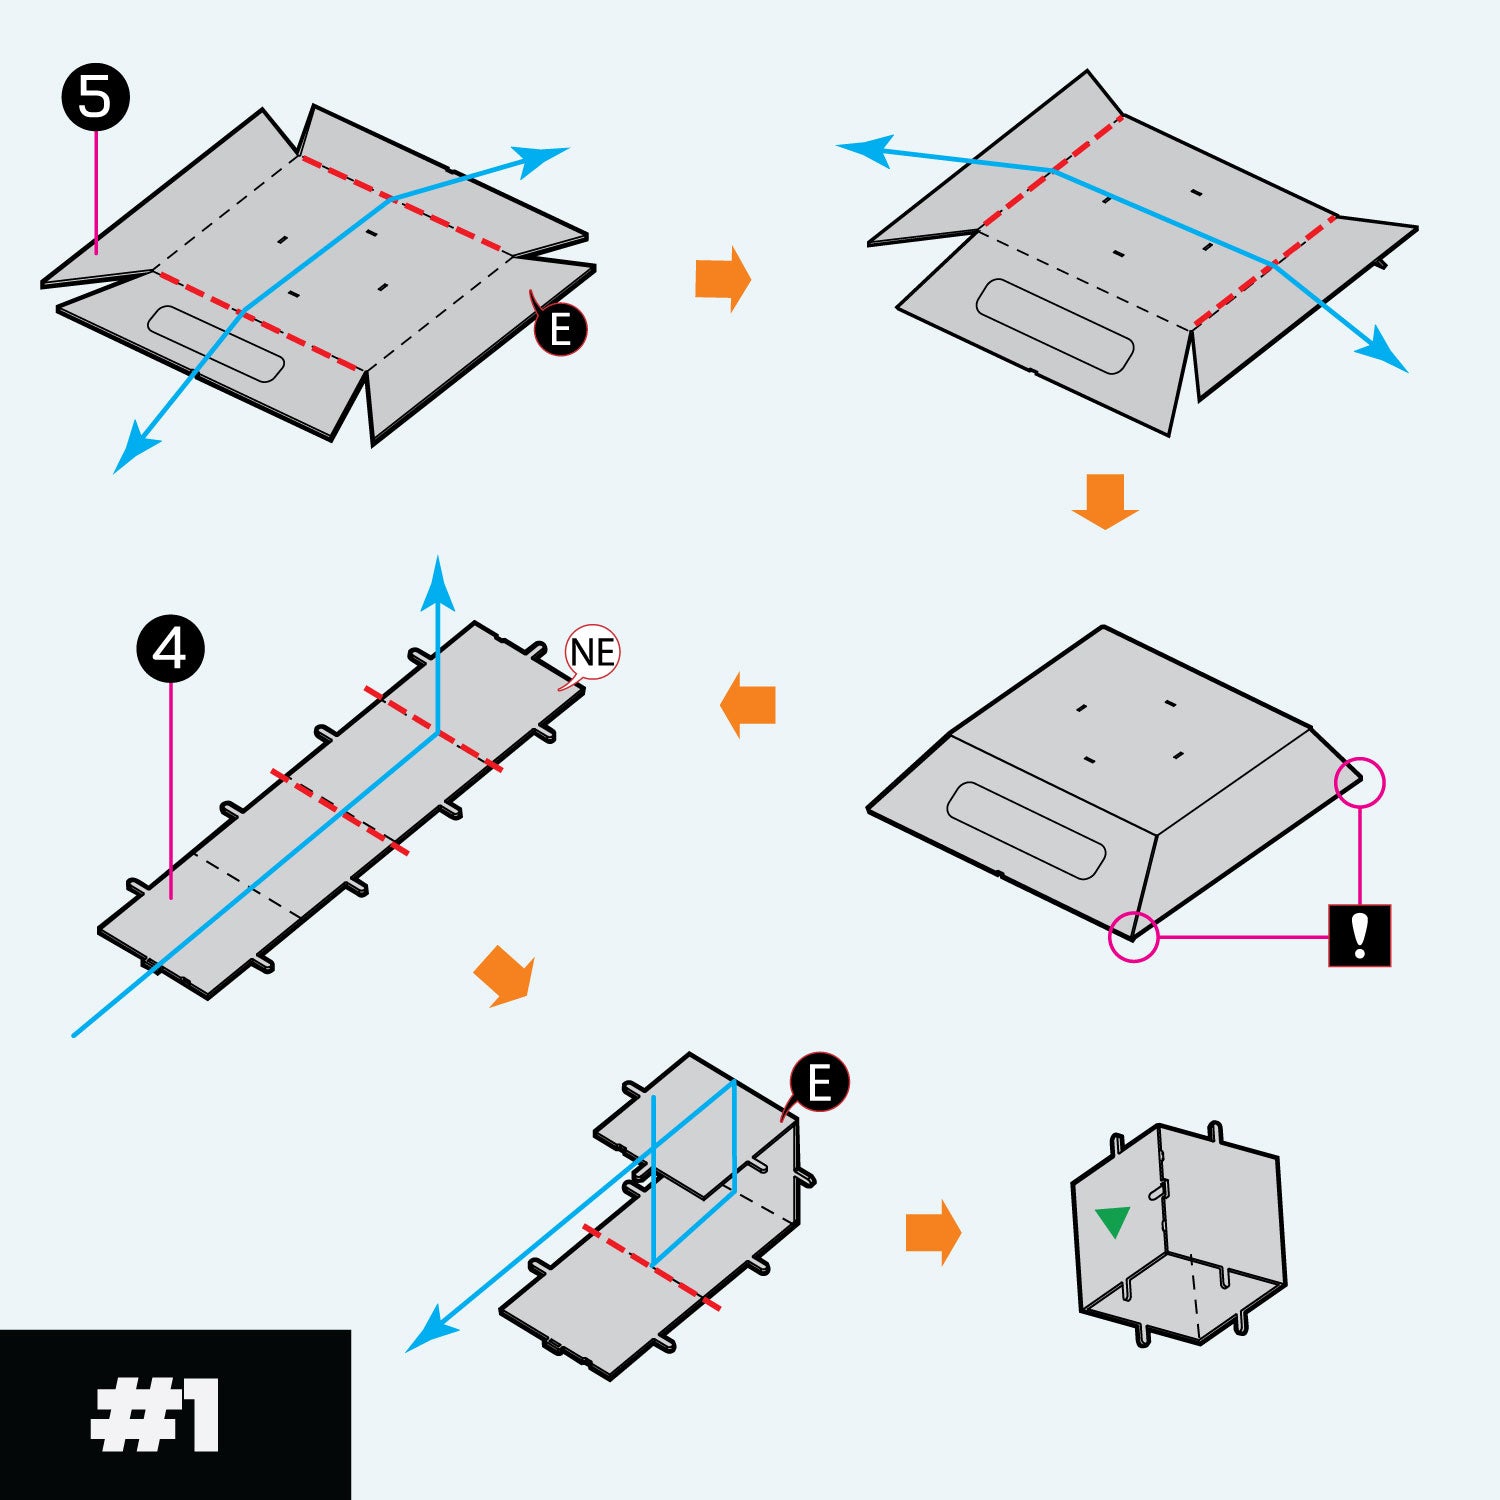
- Separate part 5 from the metal sheet by bending and snapping gently at the triangular connection points. Place the coloured side facing up and bend the four sides down along the fold lines.
- Next, separate part 4 from the sheet with the printed side facing upwards. Carefully bend it into an open box shape.
- Insert the tab into the corresponding slot and bend it by 90 degrees to securely connect the two sides.
- Finally, set aside the completed parts.
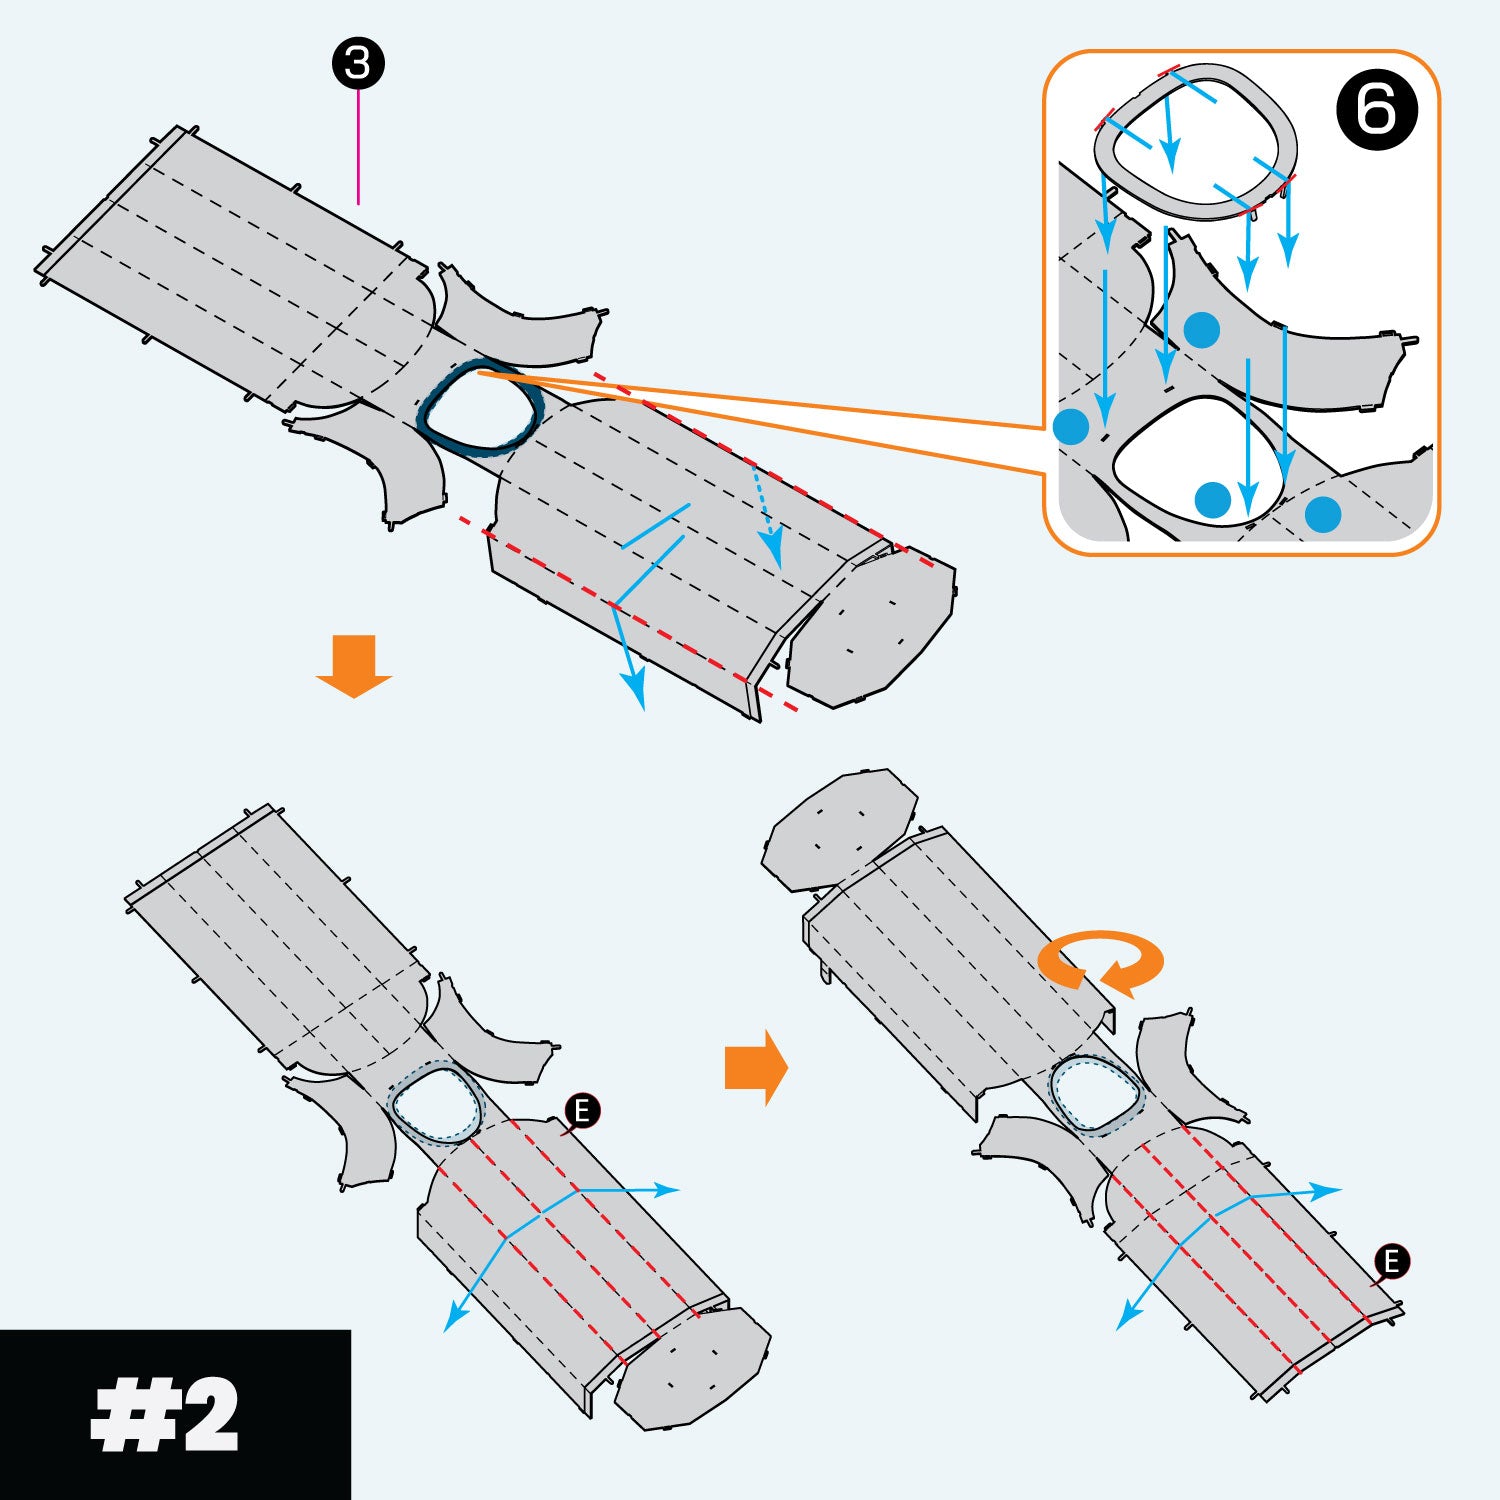
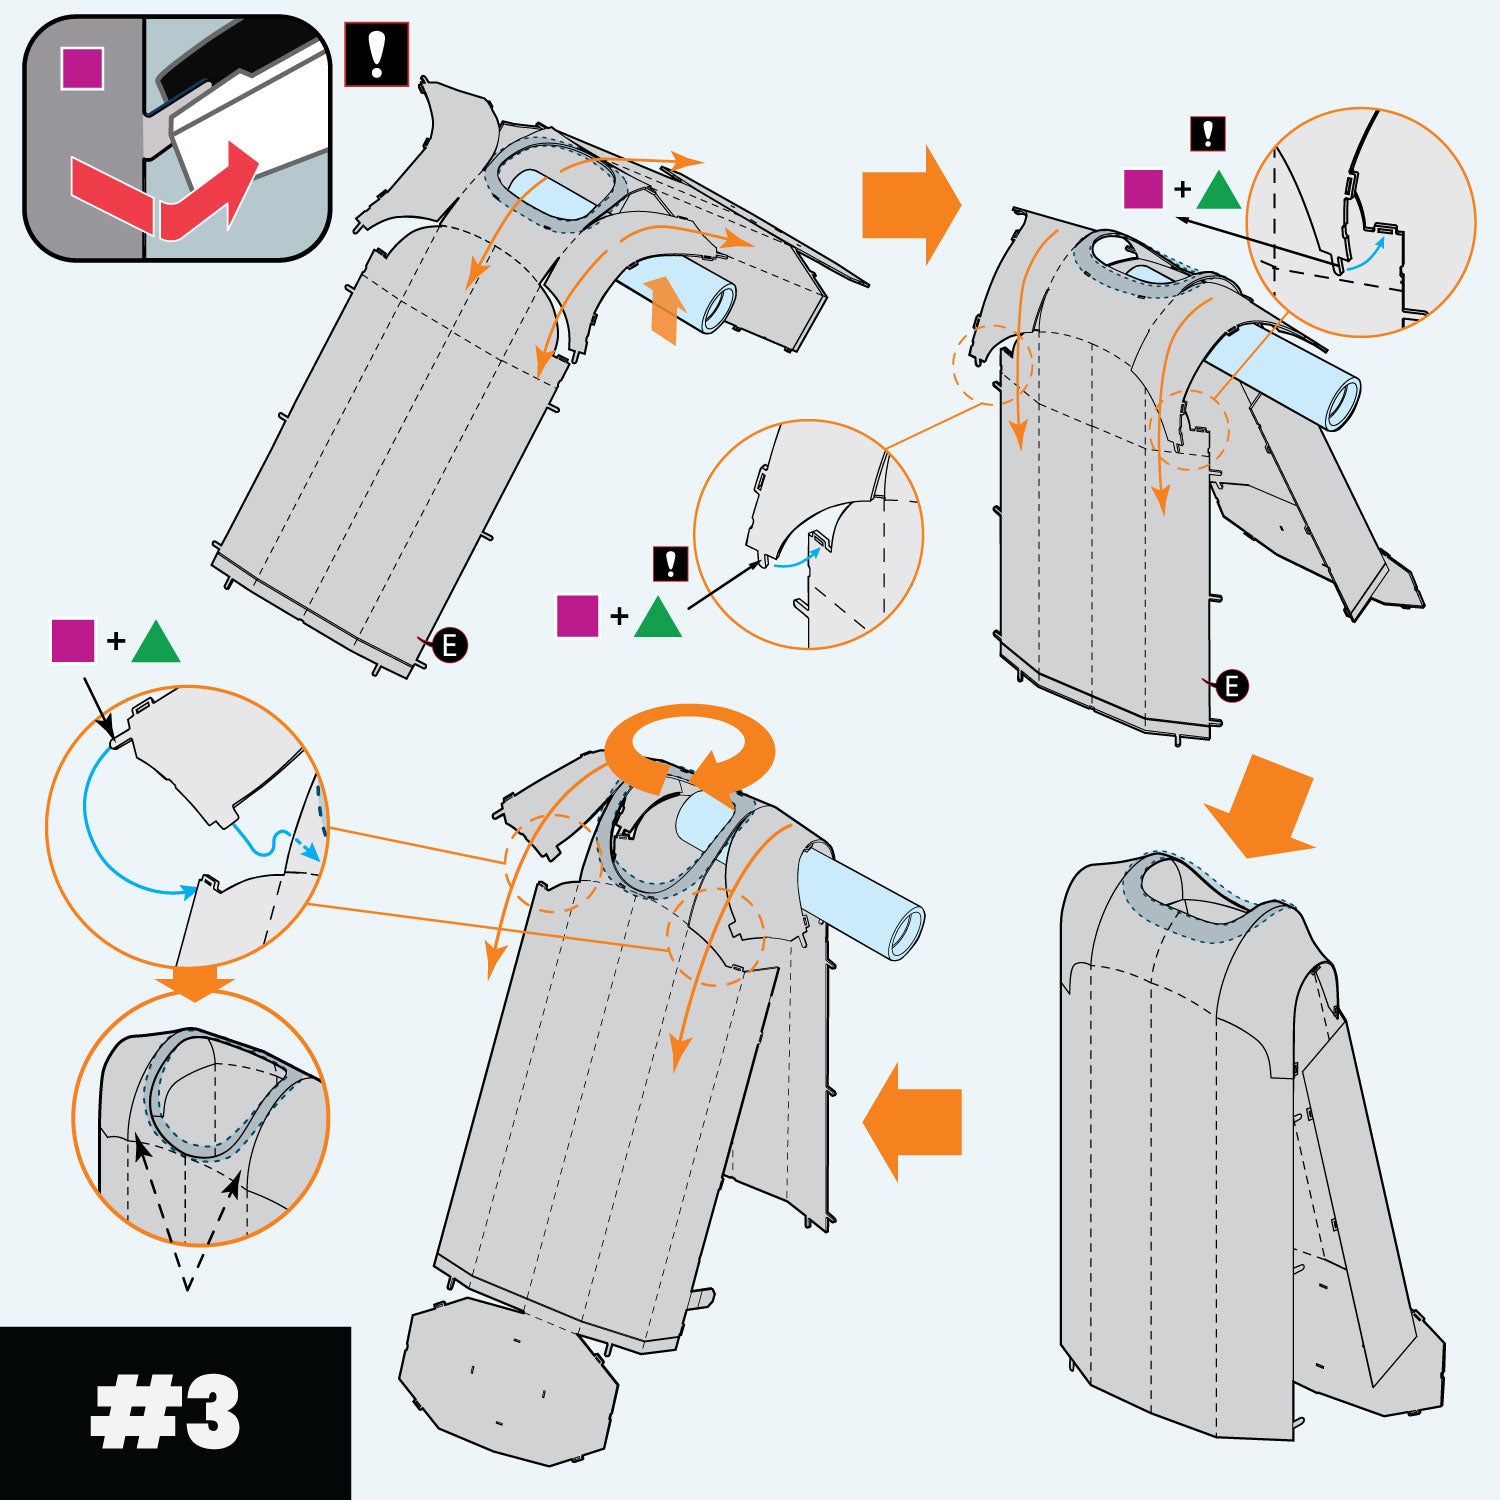
- Separate part 3, the main shirt body, from the sheet carefully to avoid damage.
- Place the part with the coloured side up on a flat surface.
- If you have a collar (part 6) shirt, separate it from the sheet.
- If you have a shirt collar wait till part 9 for application
- Bend the tabs on the collar to 90 degrees, ensuring they face downward and attach to the slots in the shirt body as indicated. Bend the tabs by 90 degrees to secure.
- For shaping the front of the shirt, refer to the picture on the instructions, using the fold lines as a guide to gently bend the jersey into shape.
- Repeat this process for the back of the shirt to match the final illustration in step 2.
- Using the tube provided, place under the shoulders and gently roll and bend the shoulder pieces to create a natural curve.
- Connect the back of the shoulder part to the body, by bending the tabs 90° before inserting into the slots.
- Insert the tabs through the slots and secure them with a 90° vertical fold.
- Connect the front of the shoulder part to the body, by bending the tab 90° before inserting into the slot.
- Insert the tabs through the slots and secure them with a 90° vertical fold.
- Ensure to tuck the larger front shoulder tabs behind the body.
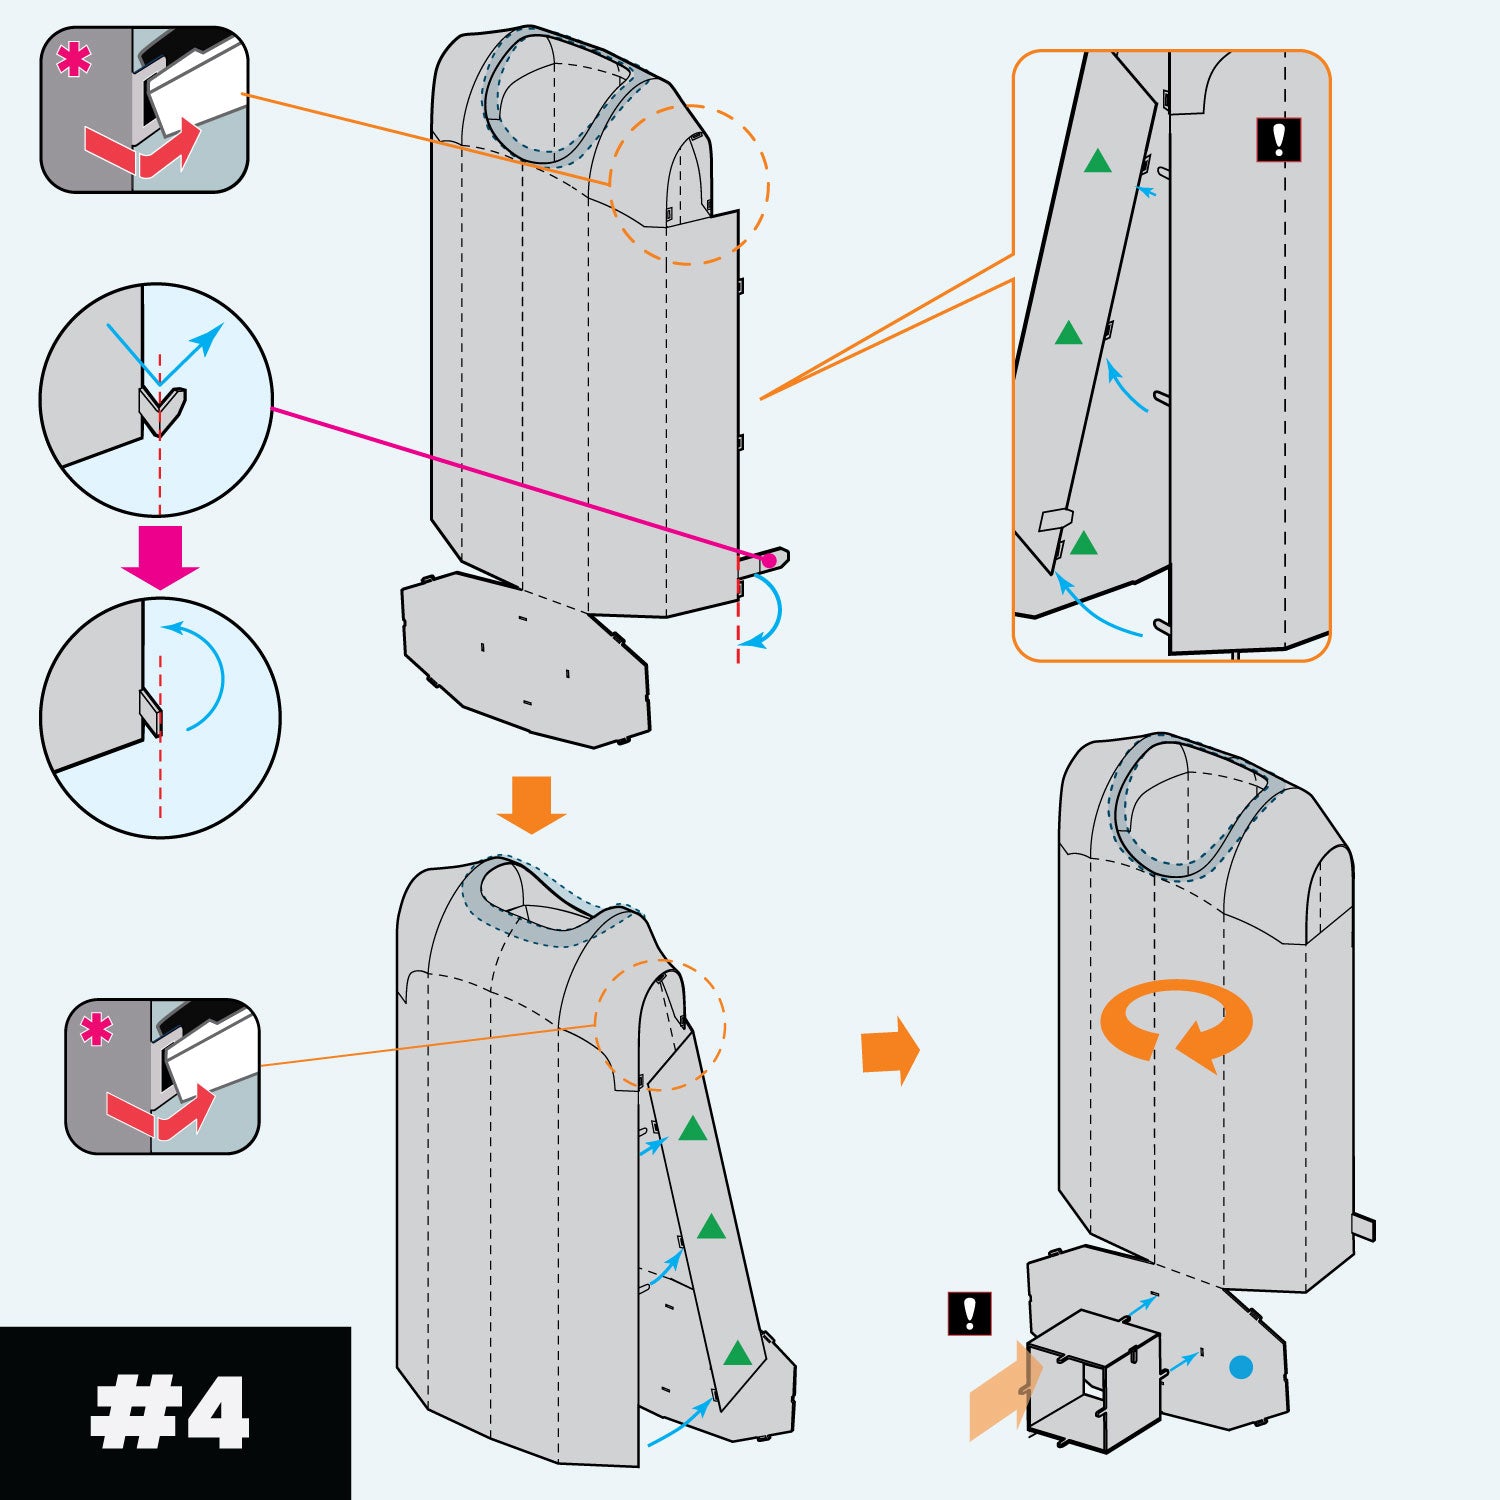
- Fold the alloy collectors logo tag at the bottom left of the shirt along the fold line.
- Connect one side of the shirt by inserting the tabs into the opposite slots, securing with a 90-degree flat bend so the tabs fold onto the rear of the body.
- Do the same on the other side.
- Insert part 4 (completed in Step 1) that supports the finished model into the base before folding the base of the shirt.
- Carefully insert the tabs into the slots of the base of the shirt and secure them with a 90-degree twist.
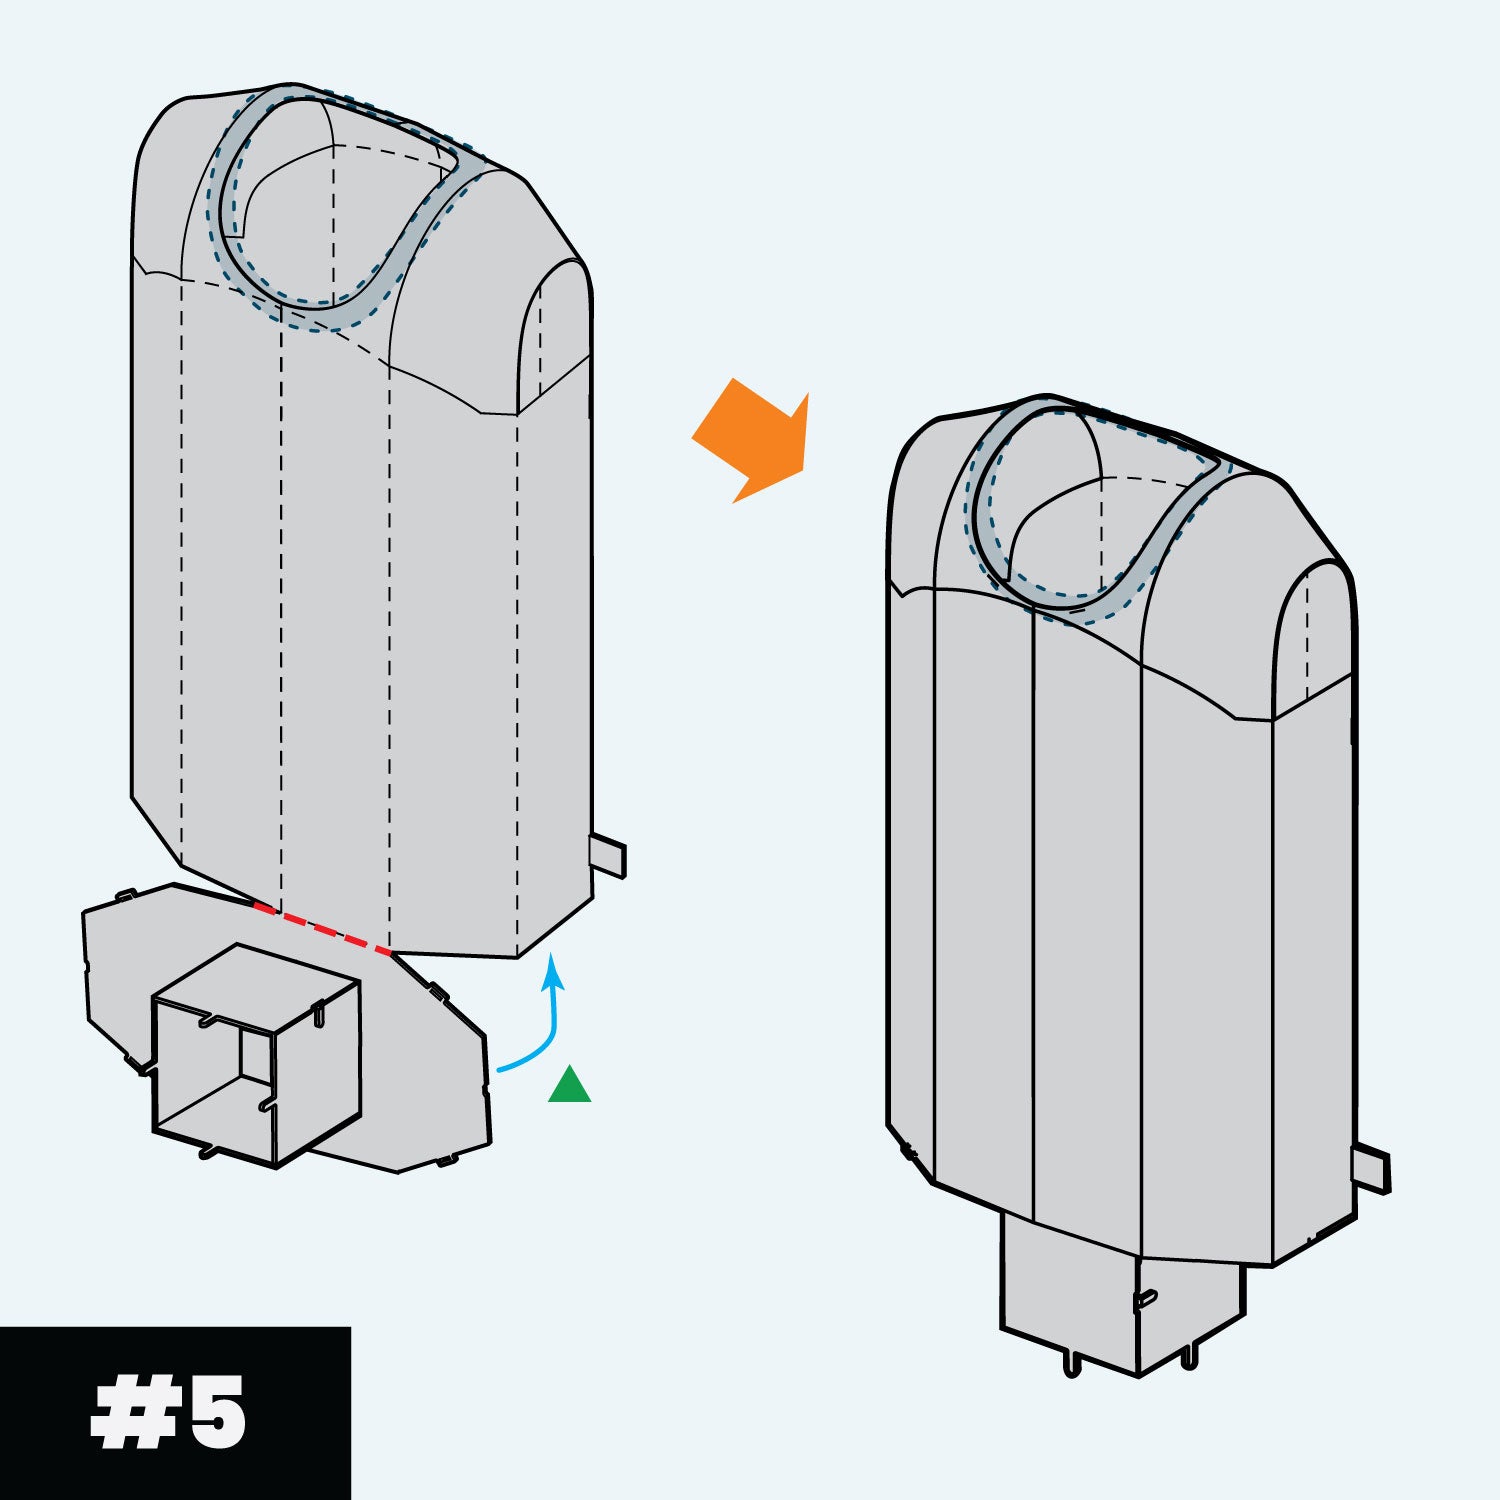
- Gently bend the base of the shirt upwards to cover the base opening of the shirt body
- Insert the tabs into the slots and secure with a 90° bend so the tabs fold under the base.

- Use the tube provided to shape the sleeves (Parts 1 and 2). Ensure the non-coloured side of the part is facing upwards.
- Gently wrap the lower part of the shirt sleeve around the tube.
- Insert the tab through the slot and secure with a 90-degree bend.
- Shape the upper part of the sleeve smoothly around the tube, connecting the tabs into the slots.
- Fold the thin ends of the upper sleeve into the lower sleeve, as shown in the final part of step 6.
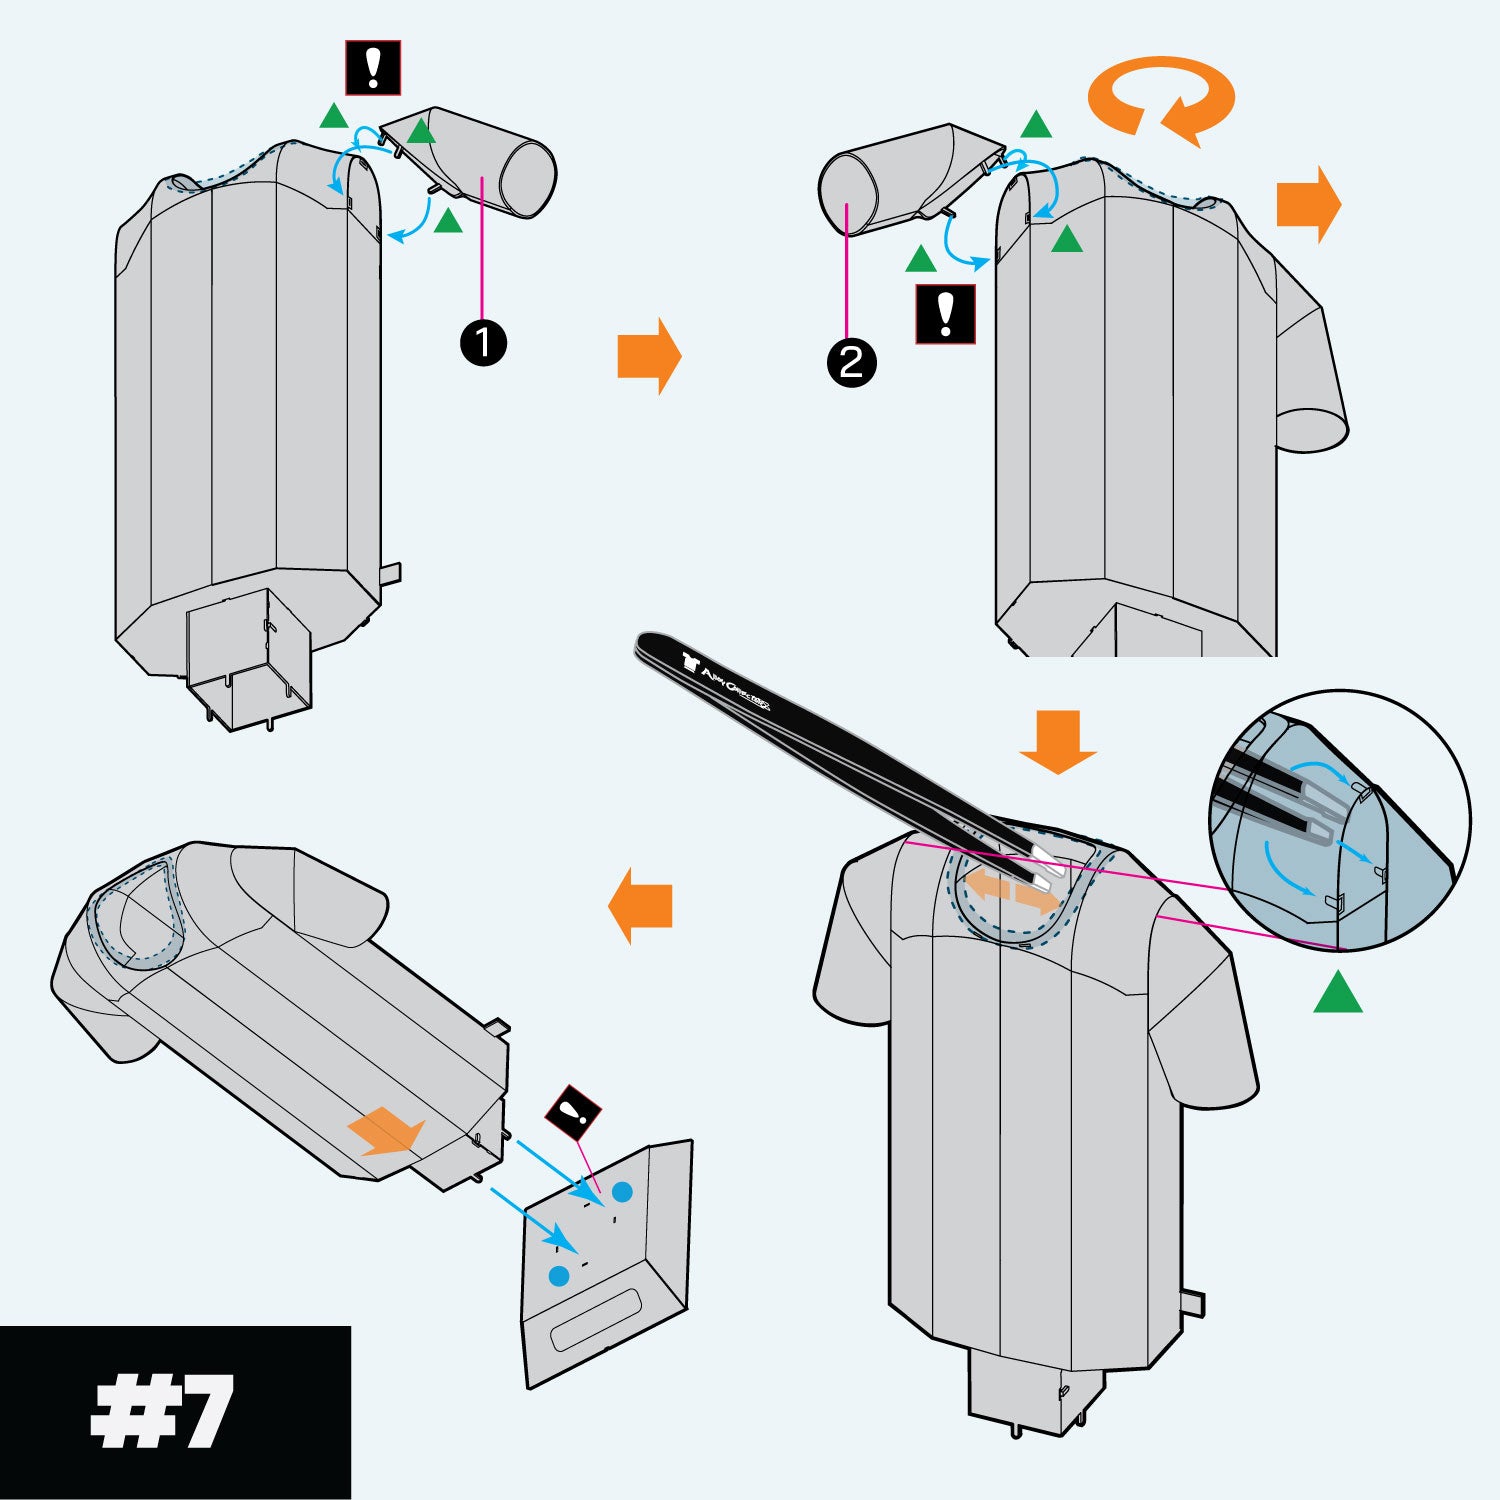
- Prepare both tabs and slots for attachment as per the instructions by pre-bending the tabs as shown.
- Carefully position the shirt sleeves, inserting the tabs into the slots.
- Use the tweezers to fold the tabs flat through the neck of the shirt.
- Attach the completed shirt to the plinth (part 5) prepared in step 1 by inserting the tabs into the slots and securing with a 90-degree twist. Make sure the front of the plinth is facing forward.

If you have a shirt collar follow the instructions above.
- Separate part 5 from the metal sheet by bending and snapping gently at the triangular connection points. Place the coloured side facing up and bend the four sides down along the fold lines.
- Next, separate part 4 from the sheet with the printed side facing upwards. Carefully bend it into an open box shape.
- Insert the tab into the corresponding slot and bend it by 90 degrees to securely connect the two sides.
- Finally, set aside the completed parts.
- Separate part 3, the main shirt body, from the sheet carefully to avoid damage.
- Place the part with the coloured side up on a flat surface.
- If you have a collar (part 6) shirt, separate it from the sheet.
- If you have a shirt collar wait till part 9 for application
- Bend the tabs on the collar to 90 degrees, ensuring they face downward and attach to the slots in the shirt body as indicated. Bend the tabs by 90 degrees to secure.
- For shaping the front of the shirt, refer to the picture on the instructions, using the fold lines as a guide to gently bend the jersey into shape.
- Repeat this process for the back of the shirt to match the final illustration in step 2.
- Using the tube provided, place under the shoulders and gently roll and bend the shoulder pieces to create a natural curve.
- Connect the back of the shoulder part to the body, by bending the tabs 90° before inserting into the slots.
- Insert the tabs through the slots and secure them with a 90° vertical fold.
- Connect the front of the shoulder part to the body, by bending the tab 90° before inserting into the slot.
- Insert the tabs through the slots and secure them with a 90° vertical fold.
- Ensure to tuck the larger front shoulder tabs behind the body.
- Fold the alloy collectors logo tag at the bottom left of the shirt along the fold line.
- Connect one side of the shirt by inserting the tabs into the opposite slots, securing with a 90-degree flat bend so the tabs fold onto the rear of the body.
- Do the same on the other side.
- Insert part 4 (completed in Step 1) that supports the finished model into the base before folding the base of the shirt.
- Carefully insert the tabs into the slots of the base of the shirt and secure them with a 90-degree twist.
- Gently bend the base of the shirt upwards to cover the base opening of the shirt body
- Insert the tabs into the slots and secure with a 90° bend so the tabs fold under the base.
- Use the tube provided to shape the sleeves (Parts 1 and 2). Ensure the non-coloured side of the part is facing upwards.
- Gently wrap the lower part of the shirt sleeve around the tube.
- Insert the tab through the slot and secure with a 90-degree bend.
- Shape the upper part of the sleeve smoothly around the tube, connecting the tabs into the slots.
- Fold the thin ends of the upper sleeve into the lower sleeve, as shown in the final part of step 6.
- Prepare both tabs and slots for attachment as per the instructions by pre-bending the tabs as shown.
- Carefully position the shirt sleeves, inserting the tabs into the slots.
- Use the tweezers to fold the tabs flat through the neck of the shirt.
- Attach the completed shirt to the plinth (part 5) prepared in step 1 by inserting the tabs into the slots and securing with a 90-degree twist. Make sure the front of the plinth is facing forward.
If you have a shirt collar follow the instructions above.
Recycle
Once your Metal Jersey is built, please recycle the scrap metal.